How to Set Up a Proxy in Windows 10 and 11
Step-by-step proxy setup in Windows 10 and 11: where to find IP, port, username and password, how to connect a proxy and how to check that it works.
In this guide, we’ll show how to set up a proxy in Windows 10 and 11. You’ll learn where to find the IP, port, username and password, how to connect the proxy, and how to make sure it works correctly.
Setting up a proxy in Windows takes only a few minutes and does not require extra software — everything is done through system settings.
Where to Find Proxy Details for Windows
After purchase, open your order in the dashboard. All connection details will be available there.
- IP / Host — proxy server address
- HTTP — connection port
- SOCKS5 — alternative port
- Login — username
- Password — password

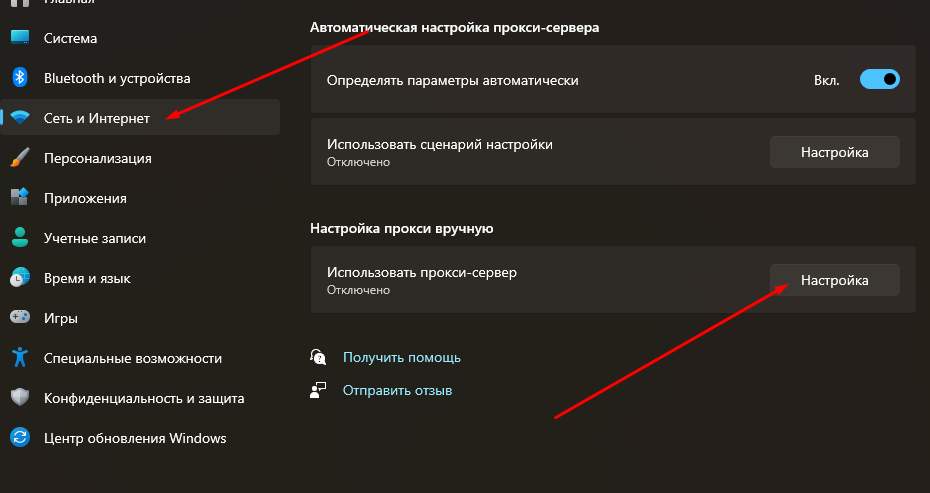
How to Open Proxy Settings in Windows 10 and 11
Go to system settings: Start → Settings → Network & Internet → Proxy.
In Windows 11 click “Set up”. In Windows 10 the fields are available immediately.
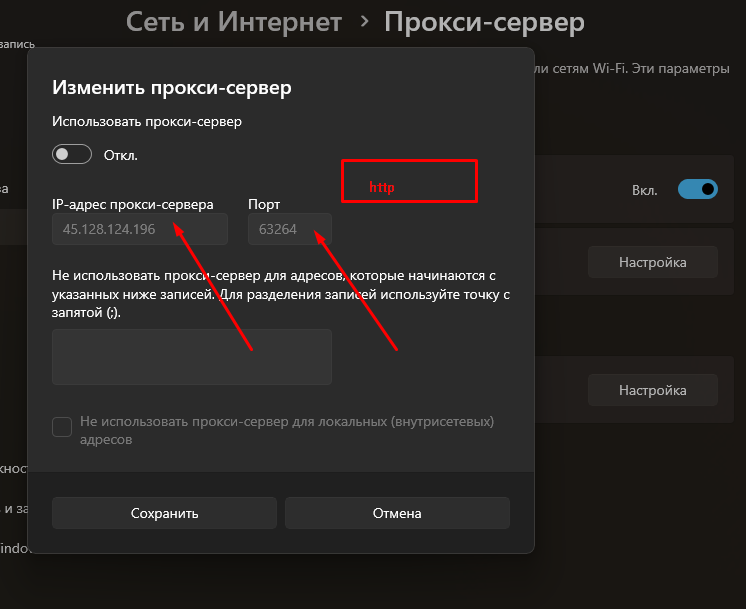
How to Enter Proxy IP and Port in Windows
Enable proxy mode and enter the details from your dashboard.
- IP — from the IP / Host field
- Port — from the HTTP column
How to Enter Proxy Login and Password
After saving the settings, open your browser. If the proxy requires authentication, a login window will appear.
Enter the username and password from your dashboard.
How to Check if the Proxy Works in Windows
Open any IP-check website. If your IP address has changed, the proxy is working.
If your IP remains the same, the proxy is not applied.
Why the Proxy Does Not Work in Windows
- Incorrect IP or port
- Wrong username or password
- Proxy is not active
- VPN is enabled
FAQ
How do I set up a proxy in Windows 10?
Open network settings, enable proxy mode and enter the IP and port from your dashboard.
Why does the proxy not work in Windows?
The most common reasons are incorrect IP, port, login details or an enabled VPN.
Need a Proxy for Windows?
Get IP, port, username and password right after purchase.
Open Dashboard